For thousands of years our ancestors have built their own homes using mostly wood. For some strange reason, however, in most places of the earth this trend has receded – nowadays we prefer to use the help of professionals to build our homes for us rather than do it ourselves. The art of self-build is still valued in many places, but that seems to be an exception, not mainstream.
So, have we simply become incapable of building our homes ourselves?
Granted, the building techniques and materials have changed a lot, but the history still shows that building ones home is not an impossible task. Moreover, I think we use too much metal and concrete building our homes, which makes building homes often too complicated. I agree that concrete and metal are materials that are both relatively cheap and easy to use, but it still leaves you wondering if the future of construction has already been “poured into the concrete”?
I have a colleague at gloghome.com, Mr Indrek Kuldkepp, who came up with the idea of wooden houses anyone could build. Essentially his company sells house plans, but with a difference – the plans are so detailed and simple to use, you do not need prior experience or education in construction. In a word: he sells professional building plans to non-professionals. In addition, since he has more than 14 years of experience with wooden houses in Asia, North America, and Europe, he is not exactly a novice.
He started moulding his idea a couple of years ago when he started wondering, if it was possible to restate the high position of wooden housing, that is namely self built. It is a nice thought I am sure, but can it be done? I suppose only time will tell, but for now, he seems to be doing extremely well.
I agree that the idea of me, for example, building a home for myself seems a bit far fetched, but not impossible – if I was presented with plans detailed enough for me to understand then why not? I’ve built stuff, when I was younger.
There are several Scandinavian countries that practice self build, only their houses often require prior contact and additional knowledge of construction so a guy like me would most probably fail. None the less – the practical and, in my opinion, down to earth approach to building ones home is anything but absurd. I’m sure, the motivation of a professional contractor could never be as high as the motivation of the house’s future residents.
In fact, the Scandinavian market is quite open to ideas to using wood as a sustainable building material. Of course, there are several different “schools”, each promoting their own way of construction as the best one, but that shows that even countries, who’s history goes back to the age of the Vikings, are still clinging on to the material once such a popular in construction. Moreover, it’s common sense, if you think about it. Wood is actually the most used material in construction, because it’s practical, sustainable, and natural – all aspects needed, to have a perfect, healthy home.
The author, George Zhordania, is a guest blogger from gloghome.com
For most people, building a wood project starts with finding a woodworking plan. Sure, plans can help, but they assume a lot from readers—often leaving out critical steps in the building process that more experienced builders no longer need—like which tools to use, which boards to buy, and what size pilot hole to drill for a particular size woodscrew. This is important stuff to know, but unfortunately it’s missing from most woodworking plans, diagrams and blueprints.
How to Build Anything has the missing pieces that woodworking plans leave out.
How to Build Anything makes no assumptions about your woodworking skills. With clear, concise language (no woodworking jargon allowed!) the 10-part series takes you step-by-step through the entire building process—from buying your first set of power tools to brushing on the final coat of finish. Even if you’ve never owned a power tool, How to Build Anything can give you the skills and confidence to build literally hundreds of simple projects for around the home.
Discover the first tools to buy and how to set up a workspace when learning basic woodworking in this video from FineWoodworking.com’s series Getting Started in Woodworking.
This video shows how to bend wood to make furniture using a bent lamination technique that involves cutting wood into the desired shape, ripping wood strips, applying glue with a roller and clamping wood pieces into place. Find out how long to let bent wood pieces dry in this free video from an award-winning woodworker on basic carpentry.
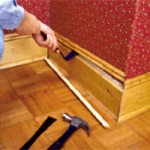
 Off with the old, in with the new. Removing that gastly, old trim you have in the dining room might not be that difficult of a job as you think. Here are some step-by-step instructions on how to get it done:
Step 1: Insert a pry bar at one set of nails and place a scrap of wood behind the bar to protect the wall. Pry gently outward to bow the molding away from the wall and loosen the nails. Move to the next set of nails and repeat the process until you’ve loosened the molding along its entire length. The easiest way to save a base shoe without breaking it is to drive its finish nails all the way through with a nail set.
Step 2: Work with a pair of pry bars to remove the molding, leapfrogging the bars in turn to gradually ease the moulding away from the wall without cracking or breaking it. With the moulding off, use a hammer or pry bar to remove any nails that remain in the wall. If you’re planning to reinstall the molding, label each piece as you remove it. This will save much time and confusion later.
With wider elements, such as baseboards, crown moldings, and the like, first drive a pair of taping knives behind the molding, then work a pry bar between the knives and molding. The knives ensure that the pry bar won’t gouge the walls. After you’ve loosened a few inches, wedge the molding away from the wall with a shim, then move along, prying and wedging as you go.
//
//
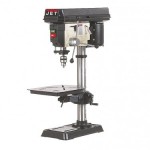
 Still questioning the usefulness of that drill press in your shop? Maybe you haven’t explored all the many ways it could be used to its full potential. Whether you use it weekly or monthly, chances are you might be missing one of these drill press tips. Check them out:
1. Prevent Clogged Bits – Keep drill flutes clear with a couple squirts of bit lubricant before you drill. This is especially helpful when you are drilling deep holes. And you’ll really notice the difference when drilling into end grain, such as on the pen blanks shown here. Without a lubricant, the flutes jam quickly.
2. Drill Without Blow-Out – Avoid blow-out on round stock by resting it in a half-round cradle instead of a V block. A cradle provides continuous support for the material so the bit won’t blast through the back, leaving a ragged exit hole. To make the cradle, drill a hole the exact size of the round stock in a small piece of scrap and then cut it in half. Mount the two halves on a sheet of plywood to cradle the stock on each end.
3. Square the Table for Accuracy – Square the table using this old machinists’ trick. Bend a piece of 1/4-in. steel rod (available at home centers) into an S shape, as shown in the photo above. Mount it in the chuck and swing it by hand to each side of the table. Use a feeler gauge between the end of the rod and the tabletop to test the clearance at each end of the table. Adjust the table tilt until there’s .003 in. or less difference between the two sides.
4. Find the Center – Perfectly center a hole by placing one face of your workpiece against a fence and dimpling the surface with the tip of the drill bit. Then rotate the workpiece end for end and dimple it again. If the two dimples don’t line up, as shown here, the fence needs to be repositioned. To center the hole, move the fence by half the distance between the two dimples.
Source: Toolking
Routers come in two basic versions depending on whether they have a fixed base or plunged base, and a plunged router allows the woodworker to make depth adjustments while cutting. In this video on woodworking tools a woodworker explains why a fixed base router works better in a router table.
This video shows how to make a cool wine bottle holder. According to the author: 45 degree cut on one end, up 17 cm and drill a 35 mm hole. Width doesn’t matter but the wider it is the more stable it will be, and the size from the center of the hole to the top also doesn’t matter.
 If you want to make any furniture in your house or you want to start your own wood products factory then woodworking equipment is a must. Woodworking equipment is used to mould a piece of wood into the desired shape. Some of the common wood working equipment include biscuit joiner, chainsaw, drill, nail gun and wood router. They are used to join 2 pieces of wood. Some of the hand held power tools are as follows:
Woodworking machine: This machine is mainly used to process wood. These machines are extensively used in woodworking and are powered with the help of electric motors
Biscuit joiner: A biscuit joiner also referred as plate joiner is commonly used for joining 2 pieces of wood. It has a 100mm diameter circular saw blade that is used for cutting a semi-circular shaped hole in wood composite panels.
Chainsaw: This wood working tool is a portable, motorized, mechanical saw. It is very useful in logging activities that include felling, bucking and limbing. Felling of trees becomes a easier job using this chainsaw. It is commonly used in removing branches and foliage that are causing obstruction. Chainsaws are often used to harvest firewood and to fell snags. So if you want to cut wood for building structures then you should use chainsaws.
Drill: If you want to make holes in wooden pieces then you can take the help of a driller. Drillers are frequently used in metal working, wood working and construction sites. Types of drill include cordless drills, and rotary hammer drills.
Jigsaw: It is a working tool that is extremely useful to cut arbitrary curves that include stenciled designs into a small piece of wood. Tool kit of most carpenters contains a jigsaw. If you require fine cutting then you must use a jigsaw.
Nail gun: If you want to insert nails into wood then the best way to do it is by using a nail gun. The nails are driven by electromagnetism, highly flammable gases that include propane or butane, and by compressed air. Previously hammers were used to insert nails into wood. By using hammers you may injure your fingers. That is why instead of hammers many carpenters are using nail guns. It has become a popular tool amongst carpenters and builders
Wood Router: It is used to hollow out (route out) an area from a large piece of wood. This working tool is now replaced by modern spindle tool. This is an electric hand
router that performs the same job and is commonly used for moulding of timber. It is also used to cut grooves, for edge moulding and to cut some joints.
Sander: It is a powerful working tool that is used to give a smooth finish to the wood. These sanders are often powered by electric motors.
Rotary tool: This tool is extremely useful as it is a multipurpose power tool. It has many rotating accessory bits that can be effectively used to cut, carve, polish etc. Rotary tool has low torque; hence it is safe for freehand use.
All these woodworking equipment will help in giving an attractive look to your furniture.
Get INSTANT ACCESS To 12,500+ Highly Professional Shed And Woodworking Plans!
This video shows how…to make a cube within a cube. This is a fun and simple project. What do you think about it?
Get INSTANT ACCESS To 12,500+ Highly Professional Shed And Woodworking Plans!
Find us on Facebook
Categories
- Adhesives For Woodworking
- Beds
- Drills
- Hand Tools
- Hardwoods
- How to
- News
- Power Tools
- Routers
- Safety
- Safety and Health
- Sanders
- Saws
- Shed
- Sheds
- Softwoods
- wood joints types
- Woodwork Machineries
- Woodworking
- woodworking business
- Woodworking Crafts
- Woodworking Equipment
- Woodworking Plans
- Woodworking Projects
- Woodworking Tools
- Woodworking Videos
FREE PLAN!
Download your free Shed Plan here.
